Welcome to the Hotpoint Gas Oven Manual, your comprehensive guide to understanding and operating your appliance safely and effectively․ This manual outlines essential information for installation, operation, and maintenance to ensure optimal performance and longevity of your oven․
1․1 Overview of the Manual’s Purpose and Structure
This manual is designed to provide clear, detailed guidance for the safe and efficient use of your Hotpoint gas oven․ It covers installation, operation, maintenance, and troubleshooting, ensuring you get the most out of your appliance․ Organized into logical sections, the manual starts with an introduction, followed by installation and setup, safety precautions, operating instructions, cooking modes, maintenance tips, and troubleshooting solutions․ Each chapter is structured to address specific aspects of the oven, making it easy to navigate and reference․ Your safety and the oven’s longevity are central to this comprehensive guide․
1․2 Importance of Reading the Manual for Safe and Effective Use
Reading this manual is crucial for ensuring safe and effective operation of your Hotpoint gas oven․ It provides essential safety guidelines, installation requirements, and operating instructions to prevent accidents and optimize performance․ Understanding the manual helps you identify potential hazards, such as gas leaks, and take appropriate precautions․ Additionally, it guides you in maintaining the appliance and troubleshooting common issues, ensuring longevity and reliability․ By following the manual, you can enjoy a safe and efficient cooking experience while preserving the oven’s functionality and warranty․
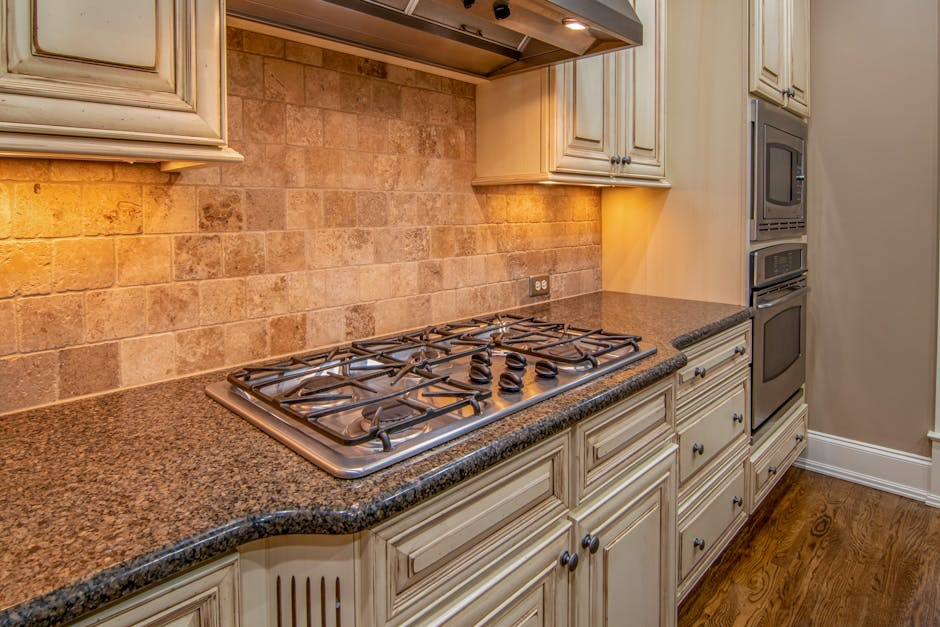
Installation and Setup of the Hotpoint Gas Oven
Proper installation ensures safety and efficiency․ Prepare the site, connect gas and electrical lines, and ensure ventilation meets specifications for optimal performance and compliance․
2․1 Preparing the Site for Installation
Before installing your Hotpoint gas oven, ensure the site is clear and free from flammable materials․ Verify the floor is level and sturdy to support the oven’s weight․ Ensure there’s adequate ventilation, as proper airflow is crucial for safe operation․ Check that electrical and gas connections meet the specifications outlined in the manual, and ensure all connections are secure and leak-free․ Consult a qualified technician for gas line installation to prevent leaks and ensure compliance with safety standards․
2․2 Connecting the Gas Line and Ensuring Safety
Connecting the gas line to your Hotpoint gas oven requires careful attention to safety․ First, ensure the main gas supply is turned off to prevent leaks․ Locate the connection points as per the manual, and use appropriate connectors to secure the line․ Apply Teflon tape to threads for a leak-proof seal․ After connecting, test for leaks using a soap solution to detect any escaping gas․ If a leak is found, tighten the connections and retest․ Once secure, turn on the gas supply and check the oven’s ignition to ensure proper function․ For added safety, consider hiring a qualified technician to perform the connection, as recommended by the manual․ This ensures compliance with safety standards and prevents potential hazards․ Always prioritize safety when handling gas lines to protect yourself and your home․
2․3 Electrical Connections and Requirements
Your Hotpoint gas oven requires a dedicated 120V, 60Hz electrical circuit to operate safely and efficiently․ Ensure the circuit is properly grounded and equipped with a 15-amp fuse or circuit breaker․ Use a UL-listed power cord or install permanent wiring according to local electrical codes․ The oven must be connected to an earthed socket to prevent electrical hazards․ Never use an extension cord, as this could cause overheating or fire risks․ Always consult a licensed electrician if you’re unsure about the wiring requirements to ensure compliance with safety standards and manufacturer specifications․
2․4 Ventilation Requirements for Proper Operation
Proper ventilation is crucial for safe and efficient operation of your Hotpoint gas oven․ Install a vent hood or exhaust fan to remove cooking fumes, moisture, and combustion byproducts․ Ensure the ventilation system is vented directly outdoors, not into attics or crawl spaces․ The ductwork should comply with local building codes, maintaining a minimum diameter of 4 inches for optimal airflow․ Avoid sharp bends or obstructions to prevent efficiency losses․ Proper ventilation reduces the risk of carbon monoxide buildup and keeps your kitchen environment clean and safe during cooking․

Safety Precautions When Using the Hotpoint Gas Oven
- Always supervise children near the oven to prevent accidents․
- Avoid wearing loose clothing that could catch fire․
- Never leave cooking unattended while the oven is in use․
- Ensure pot handles are turned inward to avoid spills․
- Never heat closed containers, as they may explode․
3․1 General Safety Guidelines for Gas Ovens
Safety is paramount when operating your Hotpoint gas oven․ Always ensure the kitchen is well-ventilated to prevent gas buildup․ Never leave cooking unattended, especially when children are nearby․ Keep flammable materials away from the oven, and avoid wearing loose clothing that could catch fire․ Regularly inspect burner caps and ensure they are properly aligned․ If you smell gas, immediately turn off the supply and open windows․ Never attempt repairs yourself; contact a qualified technician․ Follow these guidelines to ensure safe and efficient use of your appliance․
3․2 Understanding Safety Symbols and Warnings in the Manual
The Hotpoint gas oven manual includes essential safety symbols and warnings to ensure safe operation․ These symbols, such as warning triangles and fire hazards, alert users to potential dangers․ Familiarize yourself with these symbols to avoid accidents․ The manual also provides detailed explanations for each symbol, ensuring clarity․ Always read and follow the warnings carefully to prevent injuries or damage․ Understanding these symbols is crucial for maintaining a safe cooking environment and prolonging the lifespan of your appliance․
3․3 Handling Gas Leaks and Emergency Procedures
In case of a gas leak, immediately turn off the gas supply and open windows for ventilation․ Do not ignite any flames or use electrical appliances․ Evacuate the area and contact a professional․ Never attempt to repair a gas leak yourself․ If the oven malfunctions, disconnect the power and gas supply․ Keep a fire extinguisher nearby․ Regularly inspect gas connections to prevent leaks․ Familiarize yourself with emergency shutdown procedures detailed in the manual․ Always prioritize safety to avoid accidents and potential hazards․
Operating the Hotpoint Gas Oven
Mastering your Hotpoint gas oven involves understanding the control panel, ignition system, and temperature settings․ Always preheat the oven and use the timer for precise cooking․ Ensure safety by never leaving cooking unattended and keeping flammable materials away․ Refer to the manual for specific instructions on utilizing advanced features like the broiler and specialized cooking modes for optimal results․
4․1 Understanding the Control Panel and Knobs
The control panel on your Hotpoint gas oven features intuitive knobs and buttons designed for easy operation․ The burner knobs allow you to select and adjust the flame size for each burner, while the oven knob controls temperature and cooking modes․ A dedicated timer knob helps you manage cooking durations․ Always turn knobs clockwise or counterclockwise to increase or decrease settings․ Use the ignition button to light the oven burner if your model requires manual ignition․ Familiarize yourself with these controls to ensure precise and efficient cooking․ Proper operation enhances safety and performance․
4․2 How to Light the Pilot Light Manually
To manually light the pilot light on your Hotpoint gas oven, locate the pilot light assembly at the bottom of the oven․ Turn the oven knob to the “light” position and press and hold it․ Simultaneously, use a long match or lighter to ignite the pilot․ Once lit, release the knob․ Ensure the flame remains steady․ Never leave the oven unattended during this process․ If the pilot does not light, check for gas supply issues․ Always follow safety guidelines to avoid accidents․ This method applies to models without electronic ignition․
4․3 Adjusting the Flame and Temperature Settings
Adjusting the flame and temperature settings on your Hotpoint gas oven ensures precise control over cooking conditions․ To modify the flame, turn the burner knob to your desired level․ For oven temperature, use the designated control knob and monitor the display․ Precise control allows for even heating and consistent results․ Always preheat the oven before making further adjustments․ Refer to the manual for specific guidelines tailored to your model․ Proper calibration ensures accuracy, while regular maintenance keeps the system functioning optimally for reliable performance․
4․4 Using the Timer and Clock Functions
Operating the timer and clock on your Hotpoint gas oven is straightforward․ Press the timer button and use the control panel to set the desired cooking time․ Once set, the oven will automatically turn off at the end of the cycle․ The clock function allows you to keep track of cooking progress․ For accurate results, ensure the clock is set correctly before starting․ Refer to your manual for specific button sequences, as they may vary by model․ Regularly checking the timer ensures dishes are cooked to perfection without overcooking․
Cooking Modes and Functions
Your Hotpoint gas oven offers a variety of cooking modes, including conventional gas cooking, broiling, and specialized modes like slow cooking, ensuring versatile and efficient cooking experiences;
5․1 Conventional Gas Cooking
Conventional gas cooking is the primary mode of operation for your Hotpoint gas oven, offering precise temperature control and consistent heat distribution; This mode is ideal for traditional cooking methods such as roasting, baking, and broiling․ The gas burners provide immediate heat adjustment, allowing for better control over cooking processes․ Always ensure the oven is preheated to the desired temperature before placing dishes inside․ This method is perfect for achieving even cooking results and is preferred by home cooks and professionals alike for its reliability and performance․
5․2 Using the Oven’s Broiler Function
The broiler function on your Hotpoint gas oven is designed for high-heat cooking, perfect for grilling, browning, or caramelizing dishes․ To use it, ensure the oven rack is in the top position and preheat the broiler for optimal results․ Place food on a broiler-safe pan and monitor cooking closely to avoid overcooking․ This feature is ideal for achieving a crispy texture on meats, fish, and vegetables․ Always use oven mitts when handling hot pans, and keep a safe distance from the open flame to prevent accidents․
5․3 Specialized Cooking Modes (e․g․, Slow Cooking)
Your Hotpoint gas oven offers specialized cooking modes, such as slow cooking, ideal for dishes requiring extended cooking times at lower temperatures․ This mode ensures tender results by retaining moisture and evenly distributing heat․ Perfect for stews, roasts, or casseroles, it allows for hands-off cooking while maintaining rich flavors․ Other specialized modes may include rapid preheating or eco-friendly settings․ Always refer to the manual for specific instructions and temperature guidelines to achieve the best results with these advanced cooking functions․
Maintenance and Cleaning of the Hotpoint Gas Oven
Regular maintenance ensures optimal performance and longevity․ Clean the interior after each use, wipe down the exterior, and maintain the gas burners and ignition system for safe operation․
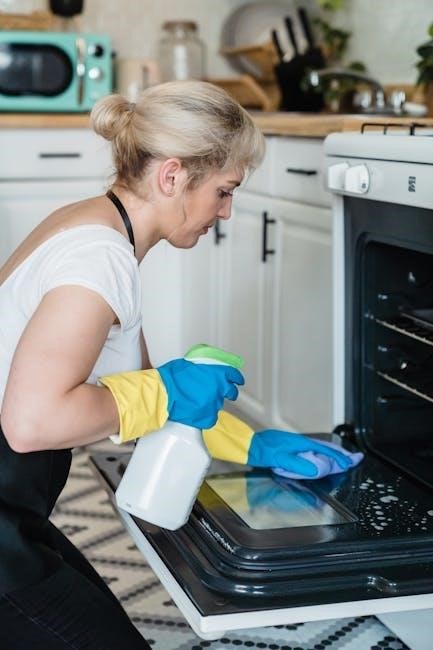
6․1 Regular Cleaning of the Oven Interior
Regular cleaning of the oven interior is essential for maintaining performance and safety․ After each use, wipe down surfaces with a damp cloth to remove food residue․ For tougher stains, mix baking soda and water to create a paste, apply it overnight, and wipe clean in the morning․ Avoid harsh chemicals to prevent damage to the enamel finish․ For models with a self-cleaning feature, follow the manual’s instructions to activate the cycle; Clean racks and shelves separately with mild soap and warm water․ A clean oven ensures even cooking and prevents fire hazards․
6․2 Caring for the Exterior and Control Panel
Regularly clean the exterior and control panel to maintain your oven’s appearance and functionality․ Use a soft, damp cloth to wipe down surfaces, avoiding abrasive cleaners or scourers that could scratch the finish․ For tougher stains, dilute mild soap in warm water and gently scrub․ Avoid spraying cleaning products directly onto the control panel to prevent damage․ Dry all surfaces thoroughly to prevent water spots․ Regular cleaning ensures the exterior remains pristine and the control panel operates smoothly․
6․3 Maintaining the Gas Burners and Ignition System
Regular maintenance of the gas burners and ignition system is crucial for safe and efficient operation․ Clean the burners with a soft brush to remove food residue and debris․ Ensure the burner caps are properly aligned and secure․ Inspect the ignition electrodes for wear or corrosion and clean them gently with a dry cloth․ Avoid using harsh chemicals or abrasive materials that could damage the components․ If you notice irregular flames or ignition issues, consult a professional to address potential gas leaks or system malfunctions promptly․

Troubleshooting Common Issues
Identify common problems with your Hotpoint gas oven, such as uneven heating or ignition failures․ Use the manual to diagnose issues, check error codes, and determine if professional assistance is needed․
7․1 Diagnosing Common Problems with the Oven
Identifying issues early ensures safe and efficient operation․ Common problems include error codes, uneven heating, or ignition failure․ Check for loose connections, blocked vents, or faulty sensors․ If the oven doesn’t light, verify the gas supply and ignition system․ Strange noises or odors may indicate worn parts or gas leaks․ Refer to the troubleshooting section for specific error codes and solutions․ Always turn off the oven and unplug it before inspecting internal components․ If issues persist, consult a professional for assistance․
7․2 Understanding Error Codes and Alarms
Modern Hotpoint gas ovens are equipped with error codes and alarms to alert users of potential issues․ These codes, such as “E1” or “E3,” indicate specific problems like faulty sensors, ignition failures, or gas supply issues․ Refer to the manual for a detailed list of codes and their meanings․ Addressing these alerts promptly ensures safety and prevents further damage․ If an alarm sounds, turn off the oven, disconnect power, and consult the troubleshooting guide or contact a professional for assistance․ Always prioritize safety when resolving these issues․
7․3 When to Call a Professional for Repairs
If you encounter issues beyond basic troubleshooting, such as persistent error codes, gas leaks, or ignition failures, it’s crucial to contact a certified technician․ Complex repairs, like faulty sensors or burner malfunctions, require specialized tools and expertise․ Additionally, if you’re unsure about diagnosing or resolving an issue, professional assistance ensures safety and prevents further damage․ Always prioritize safety and warranty compliance by involving a qualified expert for intricate or high-risk repairs․
Calibrating the Hotpoint Gas Oven
Calibration ensures accurate temperature control․ Adjust settings via the control panel to match your oven’s actual temperature․ Verification post-calibration guarantees precise cooking results and optimal performance․
8․1 Why Calibration is Necessary
Calibration ensures accurate temperature control, essential for consistent cooking results․ Proper calibration prevents undercooked or overcooked food, maintains energy efficiency, and ensures safety․ Over time, factors like altitude or gas pressure changes may require recalibration․ This step guarantees optimal performance and longevity of your Hotpoint gas oven, aligning it with manufacturer specifications for precise operation․
8․2 Step-by-Step Calibration Process
To calibrate your Hotpoint gas oven, start by preheating it to 350°F (175°C) for 20 minutes․ Use an oven thermometer to verify the internal temperature․ If it differs from the set temperature, adjust the calibration knob or follow the manual’s specific instructions․ Turn off the oven, let it cool slightly, and access the calibration controls, usually located at the back or bottom․ Adjust the screw or digital settings as needed to align the temperature accurately․ Repeat the process to confirm calibration accuracy for consistent cooking results․
8․3 Verifying Calibration Accuracy
After calibration, verify accuracy by baking a test item like cookies or bread․ Check for even cooking and consistent browning․ Use an oven thermometer to confirm the temperature matches the set value․ Test at multiple rack positions to ensure uniform heat distribution․ If results are inconsistent, repeat the calibration process․ Once accurate, your oven will deliver precise temperatures, ensuring optimal cooking performance․ Regular verification maintains reliability and prevents cooking inconsistencies over time․

Additional Features and Accessories
Discover additional features like smart technology integration and optional accessories such as griddle plates and extra racks to enhance your cooking experience with the Hotpoint gas oven․
9․1 Optional Accessories for Enhanced Functionality
Explore optional accessories designed to enhance your Hotpoint gas oven’s performance and versatility․ These may include specialized baking trays, additional racks, grill pans, and rotisserie kits․ Accessories like smart thermometers or WiFi modules can integrate with smart technology for remote monitoring․ Visit Hotpoint’s official website or authorized dealers to discover compatible products tailored to your model, ensuring enhanced cooking experiences and convenience․
9․2 Integrating Smart Technology with the Oven
Enhance your cooking experience by integrating smart technology with your Hotpoint gas oven․ Certain models offer compatibility with smart home systems, enabling remote monitoring and control via smartphone apps․ Features like voice command operation and real-time notifications ensure convenience․ Additionally, smart sensors can optimize cooking temperatures and timing․ For detailed compatibility and setup instructions, refer to your oven’s specific manual or visit Hotpoint’s official support page to unlock advanced functionality and streamline your culinary process․
This concludes the Hotpoint Gas Oven Manual․ By following the guidelines, you ensure safe operation, effective cooking, and optimal longevity for your appliance․ Happy cooking!
10․1 Summary of Key Points
Your Hotpoint Gas Oven Manual provides essential guidance for safe and efficient operation․ Key points include proper installation, regular maintenance, and understanding safety precautions․ Always follow the manufacturer’s instructions for optimal performance and longevity․ Familiarize yourself with the control panel, cooking modes, and troubleshooting tips․ Regular cleaning and calibration ensure accuracy and durability․ Refer to the manual for detailed procedures and guidelines to maximize your oven’s potential and enjoy consistent cooking results․
10․2 Final Tips for Optimal Use and Longevity
To ensure your Hotpoint Gas Oven performs optimally and lasts longer, always follow routine maintenance and cleaning schedules․ Regularly inspect gas lines and connections for leaks․ Keep the oven interior clean to prevent residue buildup․ Use appropriate cookware and avoid overheating․ Refer to the manual for specific care instructions․ Schedule annual professional inspections for safety and efficiency․ By adhering to these tips, you can enjoy consistent cooking results and extend the lifespan of your appliance․